Quick Tip: High-Resolution Export from Microsoft Office (2016) to PDF
PDF (Portable Document Format) files are, in many ways, perfect for exchanging documents that don’t need to be changed after the fact. Hence, often it makes sense to export PDF files from Microsoft Office (e.g., Word or PowerPoint) in order to make them available for others. Just think of presentation slides or handouts that you want to put online.
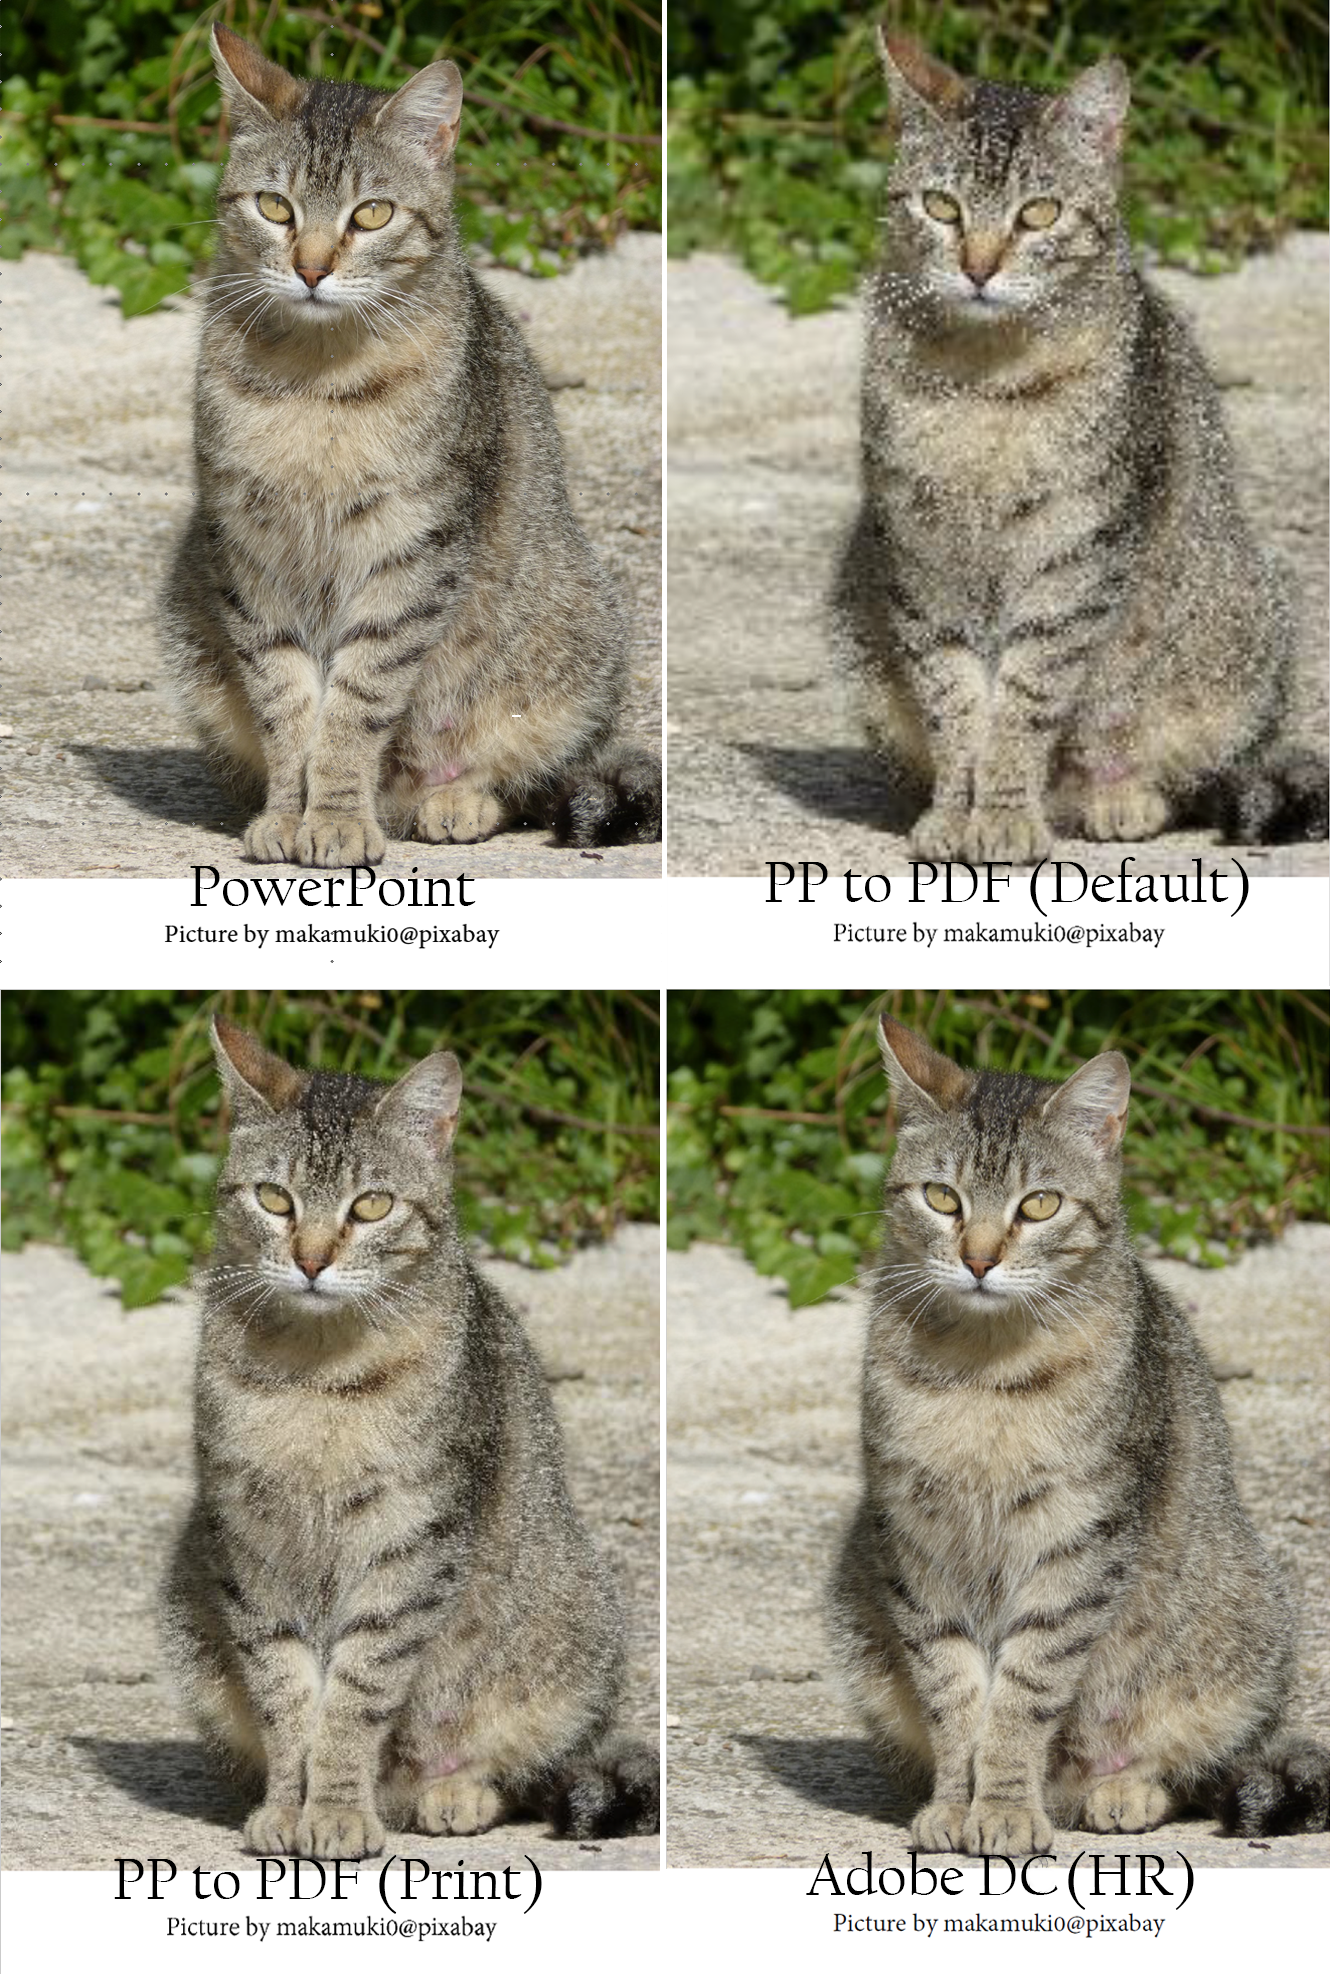
Unfortunately, the default settings of Microsoft Office (as far as I know in all versions) produce rather unimpressive results when it comes to images. The following example shows exported PDF versions of a cat photograph with various settings.
The top left image is a screenshot directly from PowerPoint 2016. On the top right, we can see a PDF export from PowerPoint with default settings. As you can see, this is rather terrible. Often, especially with smaller logos or background images, the compression artifacts are hard to spot on first glance. However, once you’ve spotted them, they really spoil an otherwise beautiful PDF export. The bottom left and right examples are exports from PowerPoint 2016 (print settings) and Adobe Acrobat DC respectively.
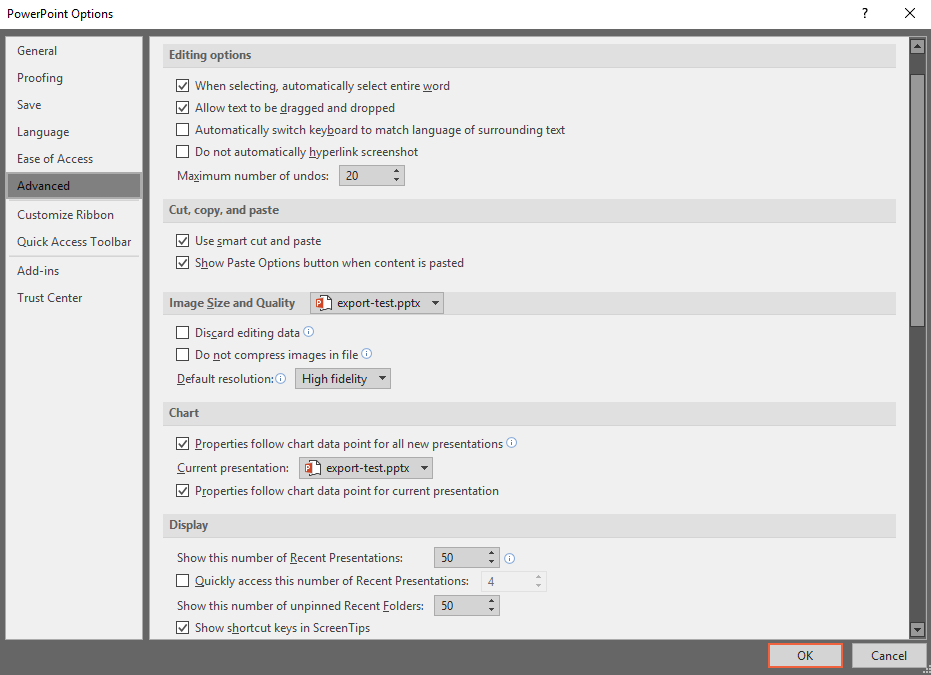
If file size (high fidelity PDFs are much larger) is not really an issue for you, it seems reasonable to just change the defaults setting in PowerPoint and Word. This can be done in the Office options menu. Unfortunately, you have to do this for all Office products individually.
In the following example, I have changed the default resolution to ‘High fidelity’ - the highest setting available. This alone will drastically improve the quality of your PDF files. If you choose to select ‘Do not compress image files,’ Office will ignore the ‘default resolution’ and just use the original image file’s resolution.
Brief 2021 Update:
In recent versions of Office (e.g., Office 2019) there are also import options in the PDF save dialogue. If you use the Save As option and select PDF as the filetype, you will see an additional Optimize for option allowing you to optimize for online and print publication. Also, in the additional Options menu, you will find the Optimize for image quality setting which should be turned on.
Adobe Acrobat Pro (DC)
However, while both the print version and the Adobe version look fine, Adobe Acrobat handles such things as transparency much better1. If you are working with complex images, transparent images, or extremely large files, Adobe Acrobat (DC) is generally advisable - despite its high cost. In this regard it is important to note that the newer versions of Microsoft Office, such as 2016, are only really compatible with the recent DC versions of Acrobat, not X or XI.
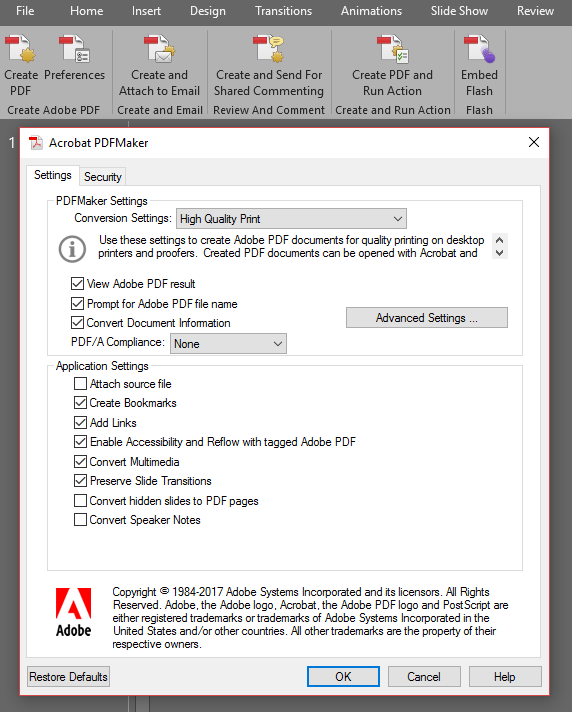
If you are using Acrobat Pro (or rather Adobe PDFMaker), make sure to also change its default setting to a higher resolution (in this case ‘High Quality Print’). Go to Preferences and then change the Conversion Settings:
The last important thing to remember is that the PDF/A format (designed for long-term archival) is not compatible with transparent images. If you export those using PDF/A settings, they will just appear slightly darker than the original transparent one.
Using a PDF Printer Driver or an Alternative PDF Toolkit
If you cannot (or don’t want to) afford Adobe Acrobat, there are various PDF printer drivers that can be used to create PDFs from anything that can be printed. They often support more features than the standard Microsoft Office export module.
The most prominent one probably is pdfforge’s PDFCreator. It’s free and also (for the most part) open source. However, the software has received some criticism for including unwanted software (and even malware) in their installer. While this seems to have been resolved, be careful!
Of course, many non-Adobe PDF toolkits such as PDFelement have powerful document conversion features that seem to work quite well. In addition to file conversion, with these toolkits, similar to Acrobat Pro, you also get features for editing PDFs.
Linux and Headless Conversion
If you are on Linux and have to convert Microsoft Office files to PDF, OpenOffice/LibreOffice seem to work best. LibreOffice even supports a very useful headless mode than can be used from the console:
apt-get install libreoffice-common
libreoffice --headless --convert-to pdf document.docx --outdir pdf
On a Mac (and Windows), the same thing should work with soffice (the LibreOffice executable) instead of of libreoffice.
-
According to Arminator (see comments), it is advisable to use the native PDF export when working with transparency generated by using PowerPoint effects (e.g., “Glow”). ↩

Thank you for visiting!
I hope, you are enjoying the article! I'd love to get in touch! 😀
Follow me on LinkedIn