Quick Tip(s): Five Useful Mural.co Tips
Visual collaboration tools and virtual whiteboards are an absolute staple when it comes to (remote) teaching, facilitation, and work in general. Having a great collaborative canvas is a game changer whether you are teaching a class, planning a project, or facilitating a design thinking workshop or a retrospective. Personally, I am also convinced that many of these digital tools will be the preferred option for hybrid and in-person workshops in the future.
Fortunately, also fueled by the massive shift towards remote work, a variety of fantastic products is available to us. Personally, at least as of early 2021, I prefer MURAL (all the features), miro (simple but powerful), and Google Jamboard (perfect for smaller projects). However, as the University of Cologne is primarily using MURAL, a decision I am very thankful for, this is currently my daily driver.
Having worked with MURAL extensively, I want to share five tips and features that help me every day.
Five Useful Mural.co Tips
If you are a MURAL power user, these will not be new for you. However, at least based on my observations, for most people, there will be at least one new thing in here 😀.
1. Regularly Visit Mural’s Blog and New Features & Updates Page
At first glance, this might not seem like a tip at all. However, the content people at MURAL are doing a fantastic job, and their blog is really worth reading. Aside from MURAL tips, much better than mine, they regularly talk about (remote and virtual) facilitation and invite interesting people to share their stories and ideas. Next to the blog, especially if you are actively using the tool, you should visit the New Features & Updates page. While the developers are constantly adding very cool features and quality-of-life updates, these often stay somewhat hidden. On the aforementioned page, the team introduces and discusses all of the new features. Most recently (February 23rd, 2021), for example, they added a feature that allows you to express yourself with emoji-based reactions (microinteractions).
2. Learn to Use the Keyboard Effectively
If you are using MURAL with a keyboard, you have a variety of keyboard shortcuts available to you. These make working with boards so much easier and can save you a lot of time. Here are three that you definitely keep in mind (Windows):
- SHIFT + Drag will select multiple items on the board. This is, for example, useful when moving around multiple stickies. This is particularly powerful when combined with the “filter by type” functionality.
- CTRL + G and CTRL + SHIFT + G will group and ungroup items. Grouping is a very powerful feature and especially useful (and necessary) when working on complex boards.
- CTRL + ALT + N or M or X will give you a sticky note (3x3, 5x3, circle) right away. This saves a lot of moving around and clicking, especially when providing participants with new stickies during an activity.
Of course, there are many more. If you are ever lost, you can simply hit the ? key to open a page detailing the shortcuts. Of course, you will also find all shortcuts in the help section at the top right of every MURAL board.
3. Make Use of Your Content Library
The Content Library allows you to store parts of your board as templates or blueprints.
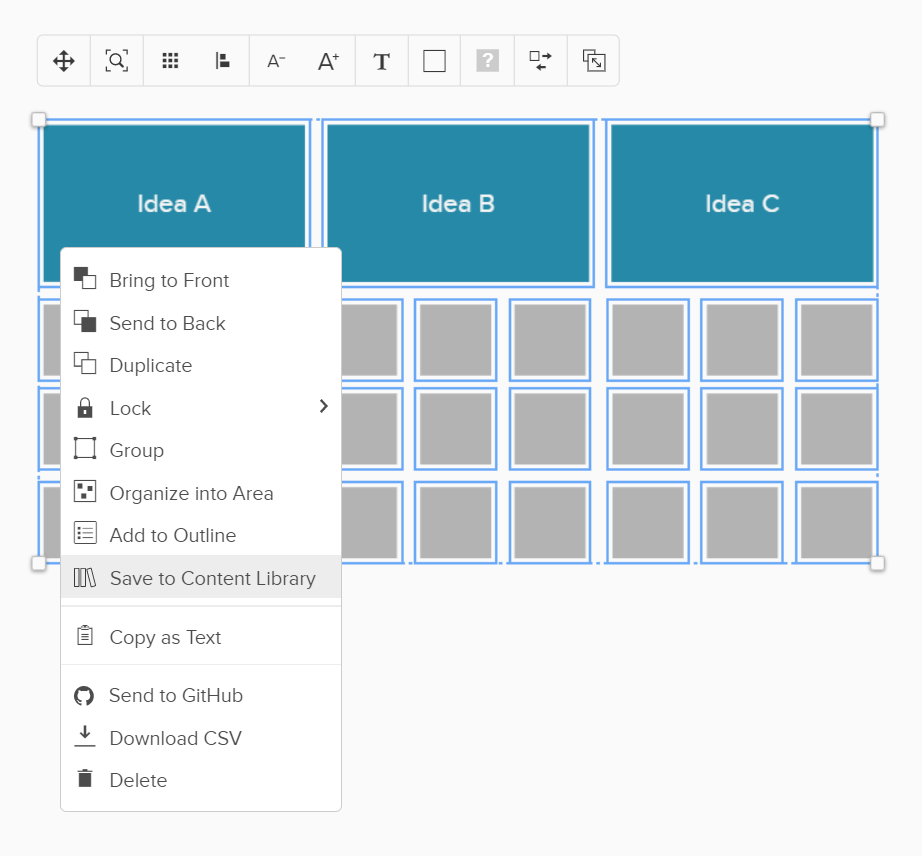
For example, as you can see above, I have created a very simple template on an empty board. After selecting all elements, you can select “Save to Content Library” in the context menu (right-click). This will add the selected elements as a template for you to use in the future. This allows you to consistently and swiftly add your activities and designs to an empty board. Basically, the content library acts as your personal repository similarly to how the Frameworks section contains pre-made grids, canvases, etc.
4. Make Use of the Areas and Outline Feature
Complex boards, especially for participants with smaller screens, can become hard to navigate. In order to make navigating your boards easier, you can use the Outline feature.
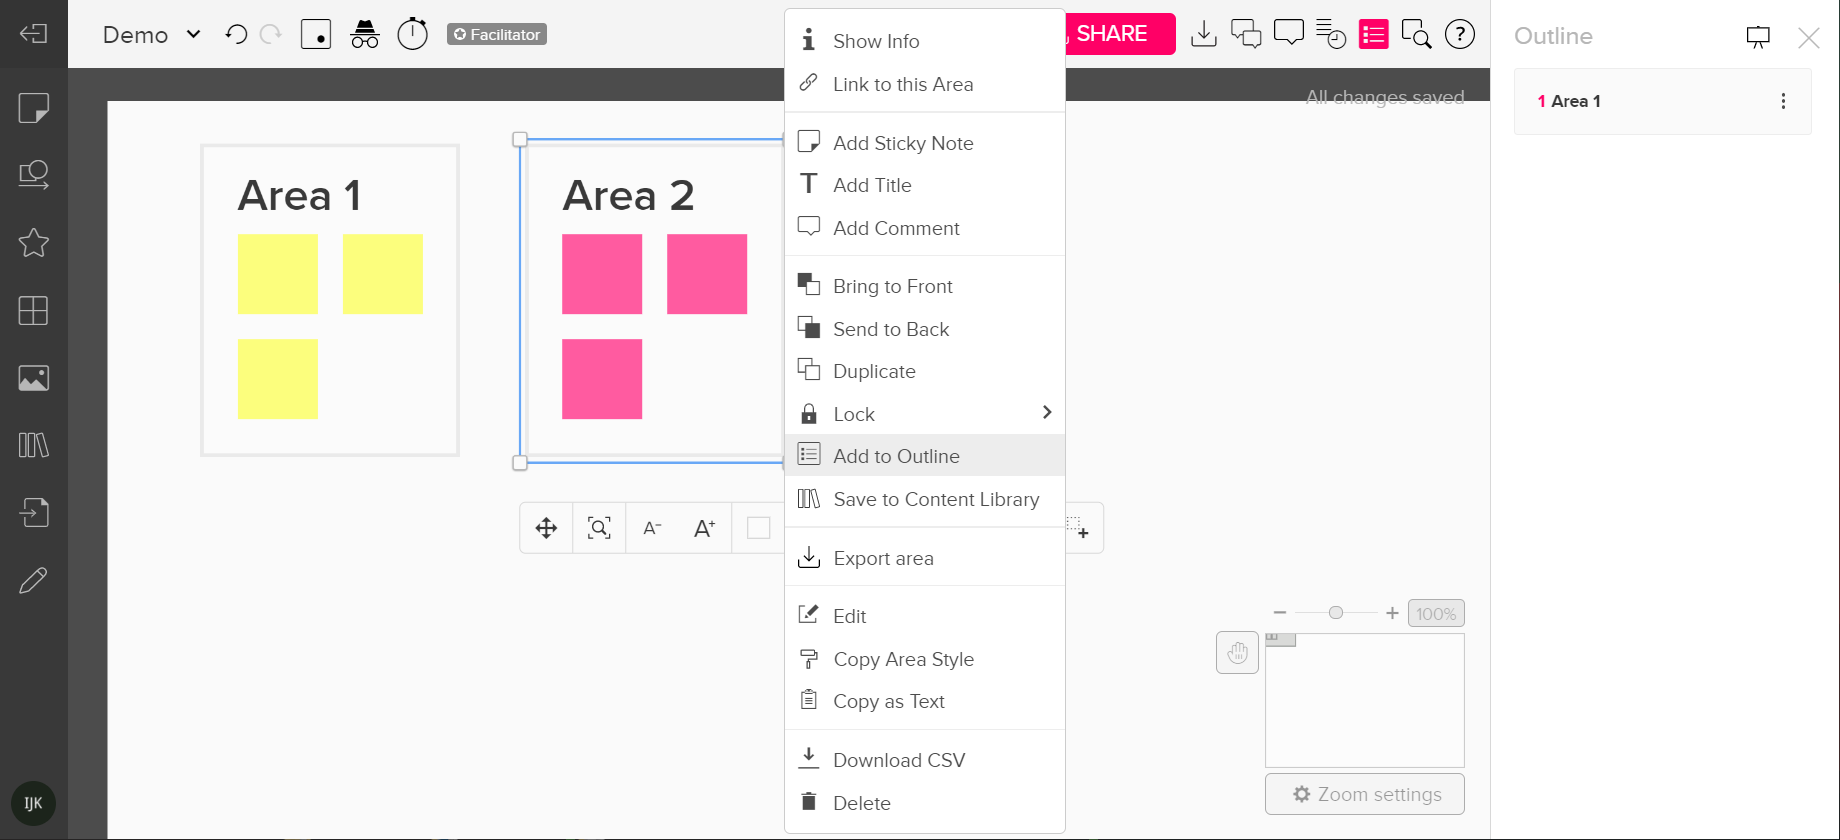
Above, I have two very simple areas. These can be created by selecting a number of elements and then, in the context menu, selecting “Organize into Area.” Then, you can select the newly created area and add it to the outline. To save time, you can also just select items and click “Add to Outline” in order to automatically generate an area around them.
If you or any participant now clicks on an item in the outline, they will be automatically moved to that area. Aside from just a more straightforward navigation, this can also be used to structure a meeting or workshop. Using the outline, you could, for example, guide your participants through a (linear) series of activities very easily.
5. Copy and Paste Items to the Board
You might be aware that you can drag and drop images (and other types of content) onto a board at any time. However, you can also copy and paste text into your board.
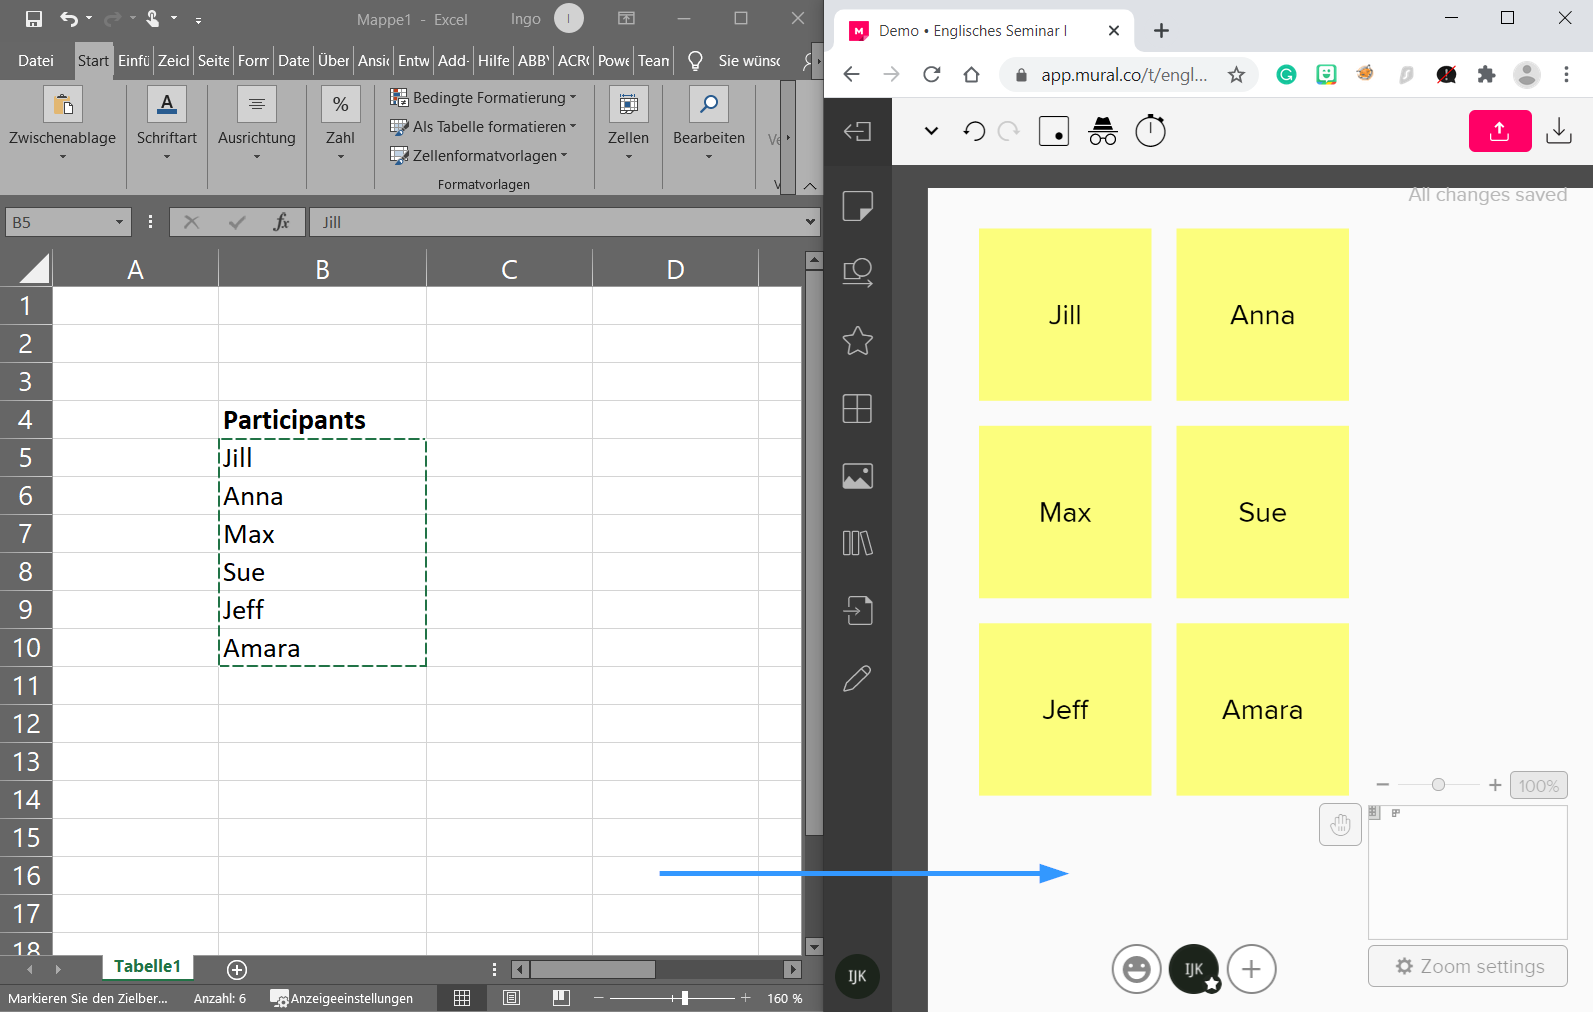
For example, as demonstrated above, I have copy and pasted a fictitious list of participants onto my board from Excel. If you paste a list of textual items, MURAL will simply create stickies for you to use. While this might seem like a minute feature, it has saved me a lot of time in the past.

Thank you for visiting!
I hope, you are enjoying the article! I'd love to get in touch! 😀
Follow me on LinkedIn